
Adventures with Cameras
(originally published in the Winter 2022 APTA News & Views)
I got schooled by one of my students earlier this year: “What cameras do you use for Practice Time and Trip Up the Teacher?” she asked.
“The Logitech camera overhead and my laptop camera, recording through StreamYard” I replied.
“Bruh, no. Laptop cameras suck. The video is so grainy. I can’t look at it. And don’t use StreamYard unless you’re livestreaming. Go old school. Do. It. The. Old. Fashioned. Way.”
Using Multiple Cameras for Teaching
Zoom and other web conferencing platforms make it extremely easy to connect multiple cameras and devices to the same meeting. If you have not yet experimented with using multiple cameras, plug them into your computer or connect via Bluetooth.
Next, head to the Video settings to find the list of cameras. From there, you can switch back and forth. If you use two devices when teaching online, you can display two camera views simultaneously.

Where to switch cameras in Zoom.
I currently use three cameras connected to my desktop computer when teaching online. My Logitech C-920 HD Pro Webcam hangs overhead the keys. It has a hole in the back to screw onto a camera tripod. I use a mic stand to camera adapter, which you can get from Amazon or Long & McQuade. This enables me to connect the webcam to a microphone stand with a boom arm.
I use its older sibling, the Logitech C-910 HD Pro Webcam as my front/side camera. Finally, I use its older cousin, the Logitech C-270 HD Webcam as my pedal cam. I toggle between cameras as needed to give my online students the best view.

My current online teaching setup.
The current model is the Logitech C-930. There are other brand names however, Logitech consistently dominates the “best webcam” lists with both old and new models. The C-900 Pro Webcam series remains a favourite among my fellow StreamYard users. Reasonably priced as well (all under $200).
Adventures in Video Recording
I recently completed my recording project of all the RCM technical requirements for the Studio’s YouTube channel. The videos chronicle my journey in content creation. Early videos were recorded with my phone. Then, I used my C-910 with the Logitech camera software. It worked all right for where I was at. Let’s just say the latter doesn’t handle fast passages or scales very well, especially when you plug in an external microphone.
Later videos were recorded via StreamYard, using either my C-910 or C-920 webcams. I sacrificed quality for convenience in StreamYard, as my current subscription only allows me to record in 720p. This did not impress my student (“too grainy”).
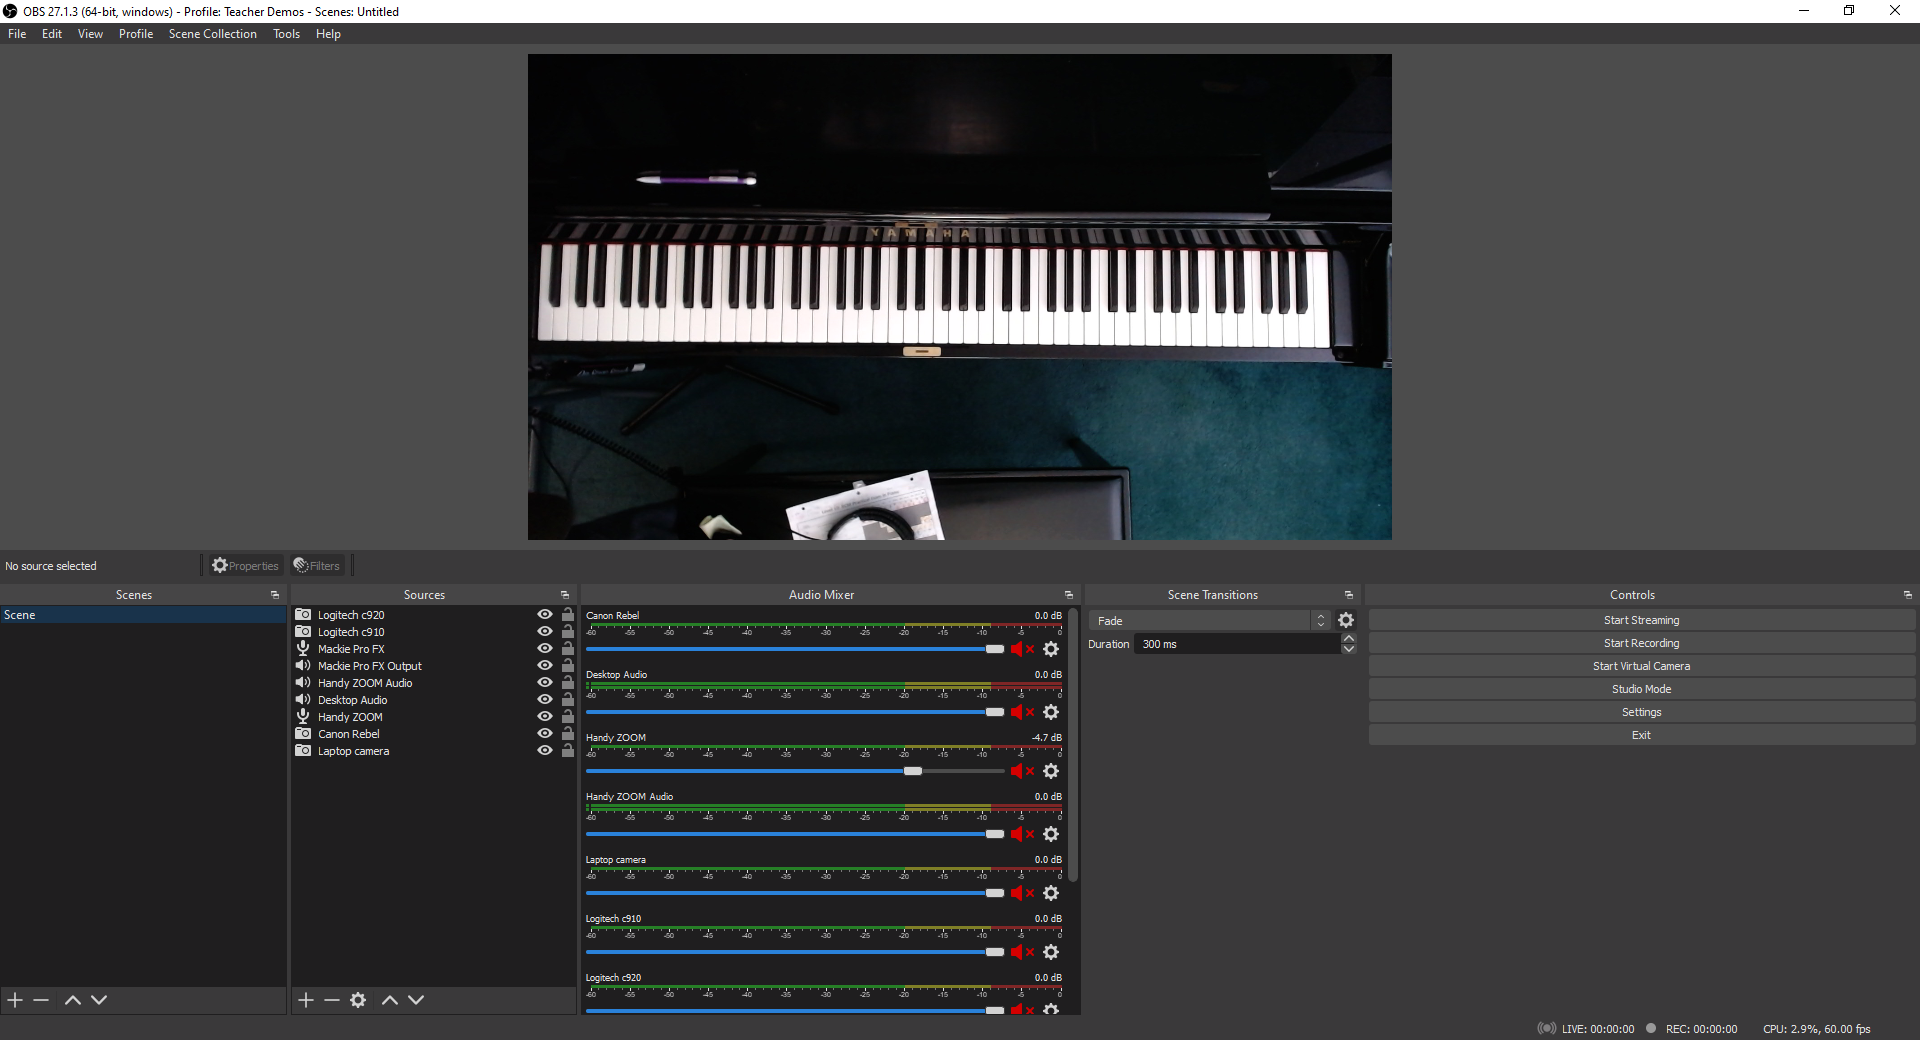
The Level 10 requirements video showcases the next level of my evolution: the Logitech C-920 Webcam and my new Lewitt LCT-140 AIR stereo pair “pencil” microphones plugged into my Mackie 6 channel mixer board. I recorded the videos using OBS Studio (Open Broadcaster Software), a popular program among content creators worldwide.
Back to my student. She declared that my Canon Rebel SLR camera should be my primary front/side camera for recording. Then, it was a tie between my HD Logitech webcams and my phone. Going back to “the old fashioned way” means to record with a good camera to the computer and then upload.
The big takeaway for webcams and video recording is this: don’t cheap out. Get the best camera you can afford. Get an HD 1080p camera or better. Many smartphones and tablets already fit that bill, just make sure to adjust your recording settings to HD. Unfortunately, most laptop cameras, as my student pointed out, “suck.”
My C-270 and C-910 are dinosaurs now, but they’re still going strong. On the other hand, my old Microsoft LifeCam, which I purchased around the same time as the C-270 has been collecting dust in a “To Discard/Recycle” pile.
Let’s Talk About Lighting
While reviewing the raw files for the Level 10 requirements, I noticed that the keys were less distinct, almost distorted at the bottom register. As you can see in this screenshot, the keys are also indistinct in the high register.

Distinctly indistinct.
I did some experimenting during lessons and discovered that the culprit is my ceiling light. Afterwards, I played around with my ring light and my softbox light. The winning setup for this recording configuration was the softbox light.
All clear now
For livestreaming, I have learned that both the softbox light and ring light are my allies. Here’s a screenshot from a supplemental video I recorded for some of my students. It’s hard to believe that I recorded this at 11 PM. The lighting is pretty bright without making me look washed out.

Recording Day
The first takeaway is that if you’re doing any video recording, you need to have good lighting. It’s much easier to record a video performance or tutorial with good lighting than trying to adjust the lighting in an editing program. Believe me, I first tried the editing route with the Level 10 files but quickly realized that it would be quicker to just re-record.
The second point is this: don’t cheap out on the lighting either. Get the best lighting you can afford. I bought a $39 ring light from Amazon early on in the pandemic. It was so flimsy that it broke after one fall onto carpet. I’m extremely happy with my $60 Ergopixel ring light. The construction is solid, from the tripod to the phone clamp. I can also switch from warm to cool lighting and adjust the intensity.
I recently received a softbox light as a gift. I think I’ll buy a softbox lighting set so I can control the light from different angles.
It’s been fun playing around with my new setup. I still have to do some troubleshooting with my Canon Rebel and figure out how I want to use my new green screen. I’m sure my students will have a few ideas on the latter.