THE MUSICAL MUSE
Blog dedicated to music education, practice tips, health
&
wellness, and geeking out.

Work and Budo Modifications with a Back Injury
As some of you know, I injured my back a couple of weeks ago. No, I wasn’t doing anything really cool like one of our awesome Iaido or Jodo kata, or going really wild on the cajón. I was simply sitting poorly at my desk and twisted funny when I got up to grab something from the printer. That’s when I felt a terrible twinge in my lower back. Next thing I knew, my body completely closed in and I could barely walk.
As some of you know, I injured my back a couple of weeks ago. No, I wasn’t doing anything really cool like one of our awesome Iaido or Jodo kata, or going really wild on the cajón. I was simply sitting poorly at my desk and twisted funny when I got up to grab something from the printer. That’s when I felt a terrible twinge in my lower back. Next thing I knew, my body completely closed in and I could barely walk.
Thankfully, I was able to see my chiropractor the following day for an emergency adjustment. He said that I completely jammed up my sacral region. I then compounded things by still using my active sitting discs while doubled up in pain for an additional day, thus aggravating my coccyx (tailbone) while sitting.
“This isn’t going to feel better right away,” he told me. “It will take a few adjustments.” He sent me hobbling off with the following advice, “Keep moving and try to avoid sitting as much as you can.” Well, considering that I need to sit at two of my instruments and work on a computer quite a bit, adjustments needed to be made.
Modifying the Studio for a Back Injury
The first thing that I rolled out of the studio was my exercise ball, which I used as my teaching chair. Next, I raised the stand for my digital piano so that I could play from standing. I spend half my time teaching from standing, so that wasn’t a big deal. However, I needed to come up with a different way to rest my muscles during lessons somehow.
I discovered during one of my shorter ushering shifts was that kneeling and going in and out of seiza was perfectly fine for my back. Seiza is the formal Japanese way of sitting, which we use in martial arts training. It’s more of a kneeling sit, although our buttocks float over our ankles. So teaching from kneeling or seiza made the afternoon and evening lessons go well. And stretching. Lots of stretching. I used these sacral release stretches quit a bit.

I’ve been getting into Child’s pose more regularly since my back injury. Credit: Iveto
My trusty Dr. Ho and Maestro’s old infrared pad have been a great help in the healing process. When I’m out running errands or working at one of my part-time jobs, I use Icy Hot patches.
Five days after my injury, I bought a Coccyx wedge to use in the car. I thought I could use it in the office and studio, but half the time, the wedge went flying off the seat because I move so much.
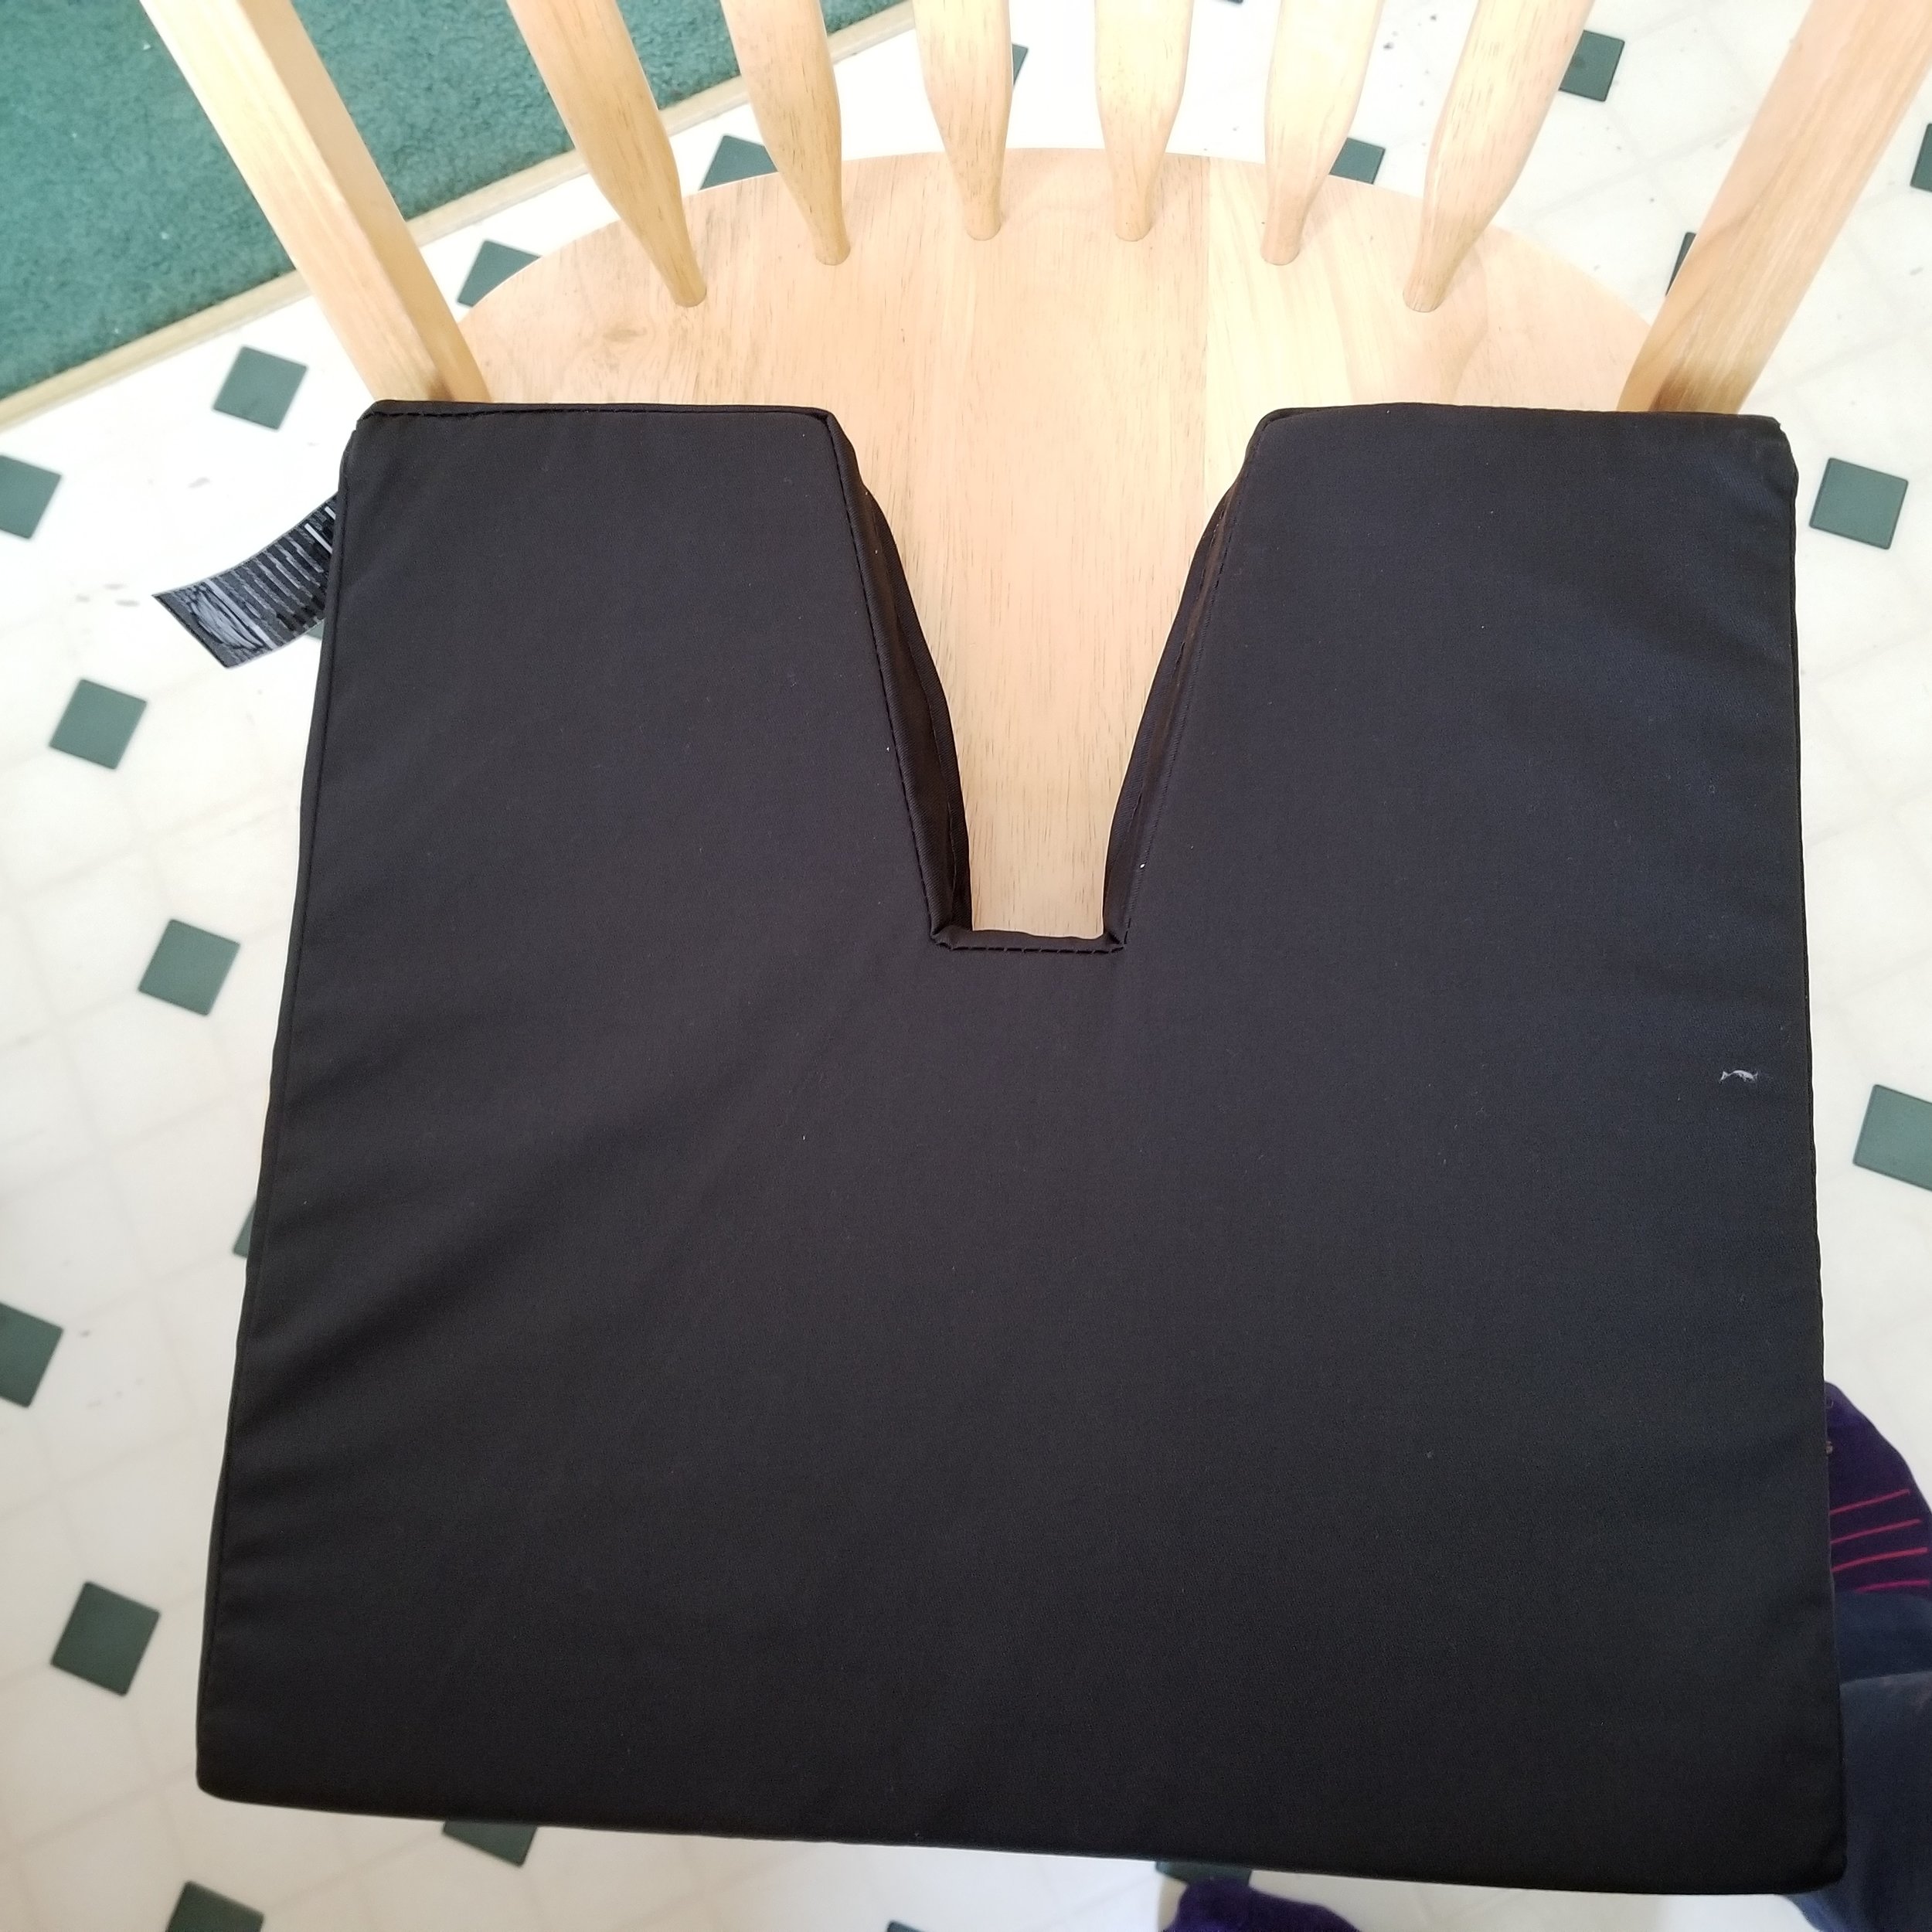
Coccyx cushion. Credit: R-M Arca.
One week after my back injury, I bought a kneeling chair from Staples to use in the office and studio. Too bad I got rid of my original chair a few years back. I am sitting in this one properly though, which is a huge improvement from last time.

Now that I’m using the kneeling chair properly (no slouching), things are going swimmingly. Credit: R-M Arca.
I’m in the process of building up my sitting endurance at the piano and cajón. I sit more or less properly at my instruments, so the only big change is that I still need to do short practice sessions with time to do sacral release stretches in between.

It was extremely easy to reconfigure my piano studio in such as way that I could take it easy on my back. Credit: R-M Arca.
Modifying Budo Training with a Back Injury
My chiropractor and massage therapist probably got tired of me asking, “When can I go back to training?” One visit, my chiropractor asked me describe the movements involved when we train. He was already grimacing when I started to show how we unsheathe our swords. I promptly stopped before my back said, “Don’t make me do sayabiki!”
Then, I tried to slowly demonstrate Uke nagashi, our third Iaido kata from the seitei set:
He stopped me very quickly and told me hold off until my back had healed some more. “No twisting.”
I have had to make myself content with practising my footwork and moving in and out of seiza. I have also been drilling small sections in my kata, such as o-chiburi, that don’t involve me to change directions. My visualization isn’t the greatest, but I’ve been mentally reviewing my troublespots and asking sensei questions every few days about something I’ve noticed or read.
However, the main way that I’ve been keeping up with training is studying. I’ve got years’ worth of notes to review, as well as manuals for the four marital arts we practice (Iaido, Jodo, Hyoho Niten Ichi Ryu, and Choken Battojutsu Kageryu). Plus, there are always videos featuring some of of our sensei that I can watch.
Today, my chiropractor cleared me to ease myself back into regular training. I have a feeling that I’ll be doing a lot of solo practice at “Tai Chi slow” speed, taking time to dissect every movement for the first little while.
Lessons Learned from Injuring my Back
If anything, hurting my back has given me the opportunity to assess and adjust how I move and sit. During the first few days, I really had to break down how I did things like get on or off my bed into small segments. I am certainly sitting and getting on and off chairs more carefully these days.
I have definitely become more mindful of my body’s state as a result. Being more mindful can only be good, right?
Roll Away Tension with the Travel Roller
The gym and massage therapist are not available 24/7, 365 days a year. That's when using a self-myofascial release tool for back pain relief comes in handy.
The gym and massage therapist are not available 24/7, 365 days a year. That's when owning a self-myofascial release tool to relieve tension and stress comes in handy.
In "Stress Levels Up in Canada, Mental Health Association Warns", the CBC reported that stress had increased 30% from the previous year. In the article, it is stated that a study conducted by Desjardins Financial Security found that one-third of the people surveyed experienced anxiety, insomnia, tension headaches and muscle pain due to stress.
The increase of self-maintenance tools available have increased since the study was completed. This implies that consumers are seeking affordable ways to relieve stress anytime, any place. These methods range from home exercise DVDs and home fitness equipment to personal massagers and self-maintenance tools. The Travel Roller falls under the "self-maintenance tool" category.
A Look at the Travel Roller
The Travel Roller is a massage therapy roller and a self-myofascial release (SMR) tool. It is made of a stiff tube covered by a soft-closed cell foam surface. These materials make the Travel Roller more durable than standard foam rollers.

The Travel Roller is highly portable, fitting easily into a bag, backpack or suitcase. Two sizes of the Travel Roller are available. The small roller is 4" X 13" while the large roller is 5" X 15". There is also the Fitter First TravelRoller Acupressure Kit, which contains three acupressure balls (soft, medium and hard), two exercise posters and the "This is How We Roll" instructional DVD. The instructional DVD is also available separately.
The Travel Roller is available in red, blue, black, pink and lilac. It eco-friendly, with no off-gassing from the materials.
How the Travel Roller Works
To relieve muscle tension, users roll on the floor with the Travel Roller, applying gentle pressure on an area that is stiff. Users can adjust the pressure applied to an area as well as the angle of the roller. They can also alternate between rolling and pausing to apply static pressure on a muscle knot.
When used properly, the Travel Roller applies similar pressure as a masseuse using his or her forearm of foot. It can be used on the upper back, lower back, calves, hamstrings, quadriceps, IT band , pelvis, shoulder, armpit, neck and feet.
The Travel Roller Story
The Travel Roller was developed by Adam Wood of Calgary, Alberta, Canada. A multi-sport athlete, he was on the Canadian bobsledding team for over four years. Adam earned his Bachelor degree in Kinesiology from the University of Calgary and attended the National Coaching Institute Calgary.
He is now a strength and lifestyle coach. When Adam began coaching office workers, he realized the severity of his clients' muscle tension and muscle pain. This inspired him to create the Travel Roller.
How Well the Travel Roller Works
Users have written to Adam Wood commenting that they noticed immediate results after using the Travel Roller. With regular use, twice a day (or more), muscle tension and pain are eased. With just one roll, the user can feel and hear the skeletal system attempt to realign itself.
When used on a particularly tense spot, great care should be exercised. It is best to start with gentle pressure and then gradually place more weight onto the roller.
One huge design improvement since the Travel Roller was first released is that the cell foam is secured more thoroughly. This minimizes, if not eliminates the possibility of the cell foam becoming unglued from the tube. However, the foam is not indestructible. A curious pet can easily leave its mark on the foam with one bite.
The Travel Roller withstands the pressure used by people large and small. It works especially well on relieving back pain. The Travel Roller also works well on easing tension in the legs and shoulders. As for easing neck pain and neck tension, that takes a bit of practice to get the hang of it.
I have owned the Original Travel Roller and have version 3.8. The current model out on the market is 4.3. I can tell you that the design improves with each new release. Any complaints that I have about my Travel Roller has been addressed in subsequent models:
Sturdier construction: The glue on the foam (Version 1.0 ) weakened with age, so the foam kept coming off. I'm glad to see that version 3.8 up to 4.3 do not have this issue.
The foam doesn't lose shape.
Design improvements on the storage container: You can store your acupressure balls, exercise band, your wallet, water bottle or your [insert blank] securely. My 3.8 is holding up well and can still hold the band and the balls (but anything else would fall out). Version 4.3 has a drawstring to keep the contents secure.
The Travel Roller works best when the user is barefoot or wearing proper footwear for exercising. Using the Travel Roller in stockinged feet is not advisable.
Cleaning the Travel Roller is relatively simple. Wash in warm warm soapy water. I usually let it air dry.
Alternative Self-Maintenance Tools
The Travel Roller is just one of a growing number of self-maintenance tools out on the self-massage market. There are also foam rollers, massage sticks, spiky massage balls and acupressure balls.
The Travel Roller is available at Fitter First as well as Amazon. Locally, you can check your local exercise store or your physiotherapist's office. The Travel Roller Acupressure Kit retails between $73 - $79 USD. The Travel Roller sells for $44 - $49 USD, while the Travel Roller Athlete Kit (roller, one acupressure ball and a stretching band) retails for $59 USD.
As far as self-myofascial release tools go, the Travel Roller's portability and durable construction are huge benefits. The fact that it is fairly easy to use is also a bonus. Another boon is that regular use of the Travel Roller can cut down on visits to the massage therapist or chiropractor. Perhaps the biggest advantage is that the Travel Roller can be used several times throughout the day, every day.
Originally published on Suite101.com on March 30, 2010. Updated March 23, 2013. All rights reserved by Rhona-Mae Arca.
Social Media Links
archives
- #YYCArts 32
- #YYCEvents 39
- Collaborative Music 25
- Community 11
- Composing & Arranging 6
- Entertainment 139
- Entrepreneurship 53
- Freebies 3
- Gardening 1
- Geeking Out 65
- Health & Wellness 120
- Improvisation 25
- Interviews 28
- Learning Music 188
- Martial Arts 13
- Memorization 7
- Music 230
- Music Careers 9
- Music Education 196
- Music Examinations 7
- Music Exploration 55
- Music Gigs 14
- Music Lessons 6
- Music Performance 32
- Music Theory 13
- Musical Instruments 12
- Musician Health 19
- Pets 57
- Piano Technique 12
- Practicing Music 120
- Productivity 20
- Professional Development 11
- Recommendations & Reviews 93
- Recreation 71
- Social Media 6
- Spirituality 10
- Studio Management 33
- Studio Technology 50
- Teaching Music 146
FOLLOW THE STUDIO on Instagram


Affiliate Links
As a Sheetmusicplus and CD Japan affiliate, I earn from qualifying purchases. The earnings help fund the Studio’s blog and YouTube channels. Your support is greatly appreciated.


FOLLOW Budo no Tabi on Instagram